Setting Up VMC for Dance Dash in Streamlabs
*This is a continuation of my other post “Setting Up Virtual Motion Capture for Dance Dash in OBS Studio”. This is slightly tweaked for the audience who use Streamlabs as opposed to OBS Studio to stream/record their content. → https://write.kilioa.net/setting-up-vmc-with-dance-dash/setting-up-virtual-motion-capture-for-dance-dash-in-obs
The Streamlabs Desktop version used for this tutorial is 1.14.0
Preface: Roadblock for not being able to use Streamlabs on its own
*This is a brief explanation as to why we cannot use Streams alone to use VMC with Dance Dash. Skip to the next step if you want to go straight into the setup process.
As you may know, Streamlabs does have a virtual webcam feature (as an experimental feature).
The biggest difference between the two is that, OBS Studio will allow us to make a selection for the “Output Selection”, while Streamlabs does not.
 So, until we are able to make an output selection for what we want the virtual webcam to be capturing, this is our workaround.
Long story short, if you're using streamlabs to record/stream, you will need both OBS Studio and Streamlabs launched at the same time.
OBS Studio will be used for the virtual webcam feature alone, while Streamlabs will be doing your actual streaming/recording.
Actual Beginning of Tutorial
1. Follow the original blog post (https://write.kilioa.net/setting-up-vmc-with-dance-dash/setting-up-virtual-motion-capture-for-dance-dash-in-obs) up until the end of Step 19.
By getting to the end of Step 19. in the original post, it should get you to the point to where you have been able to get your VMC + DD, composited using LIV.
Your LIV output should currently be showing your avatar and Dance Dash game scene.
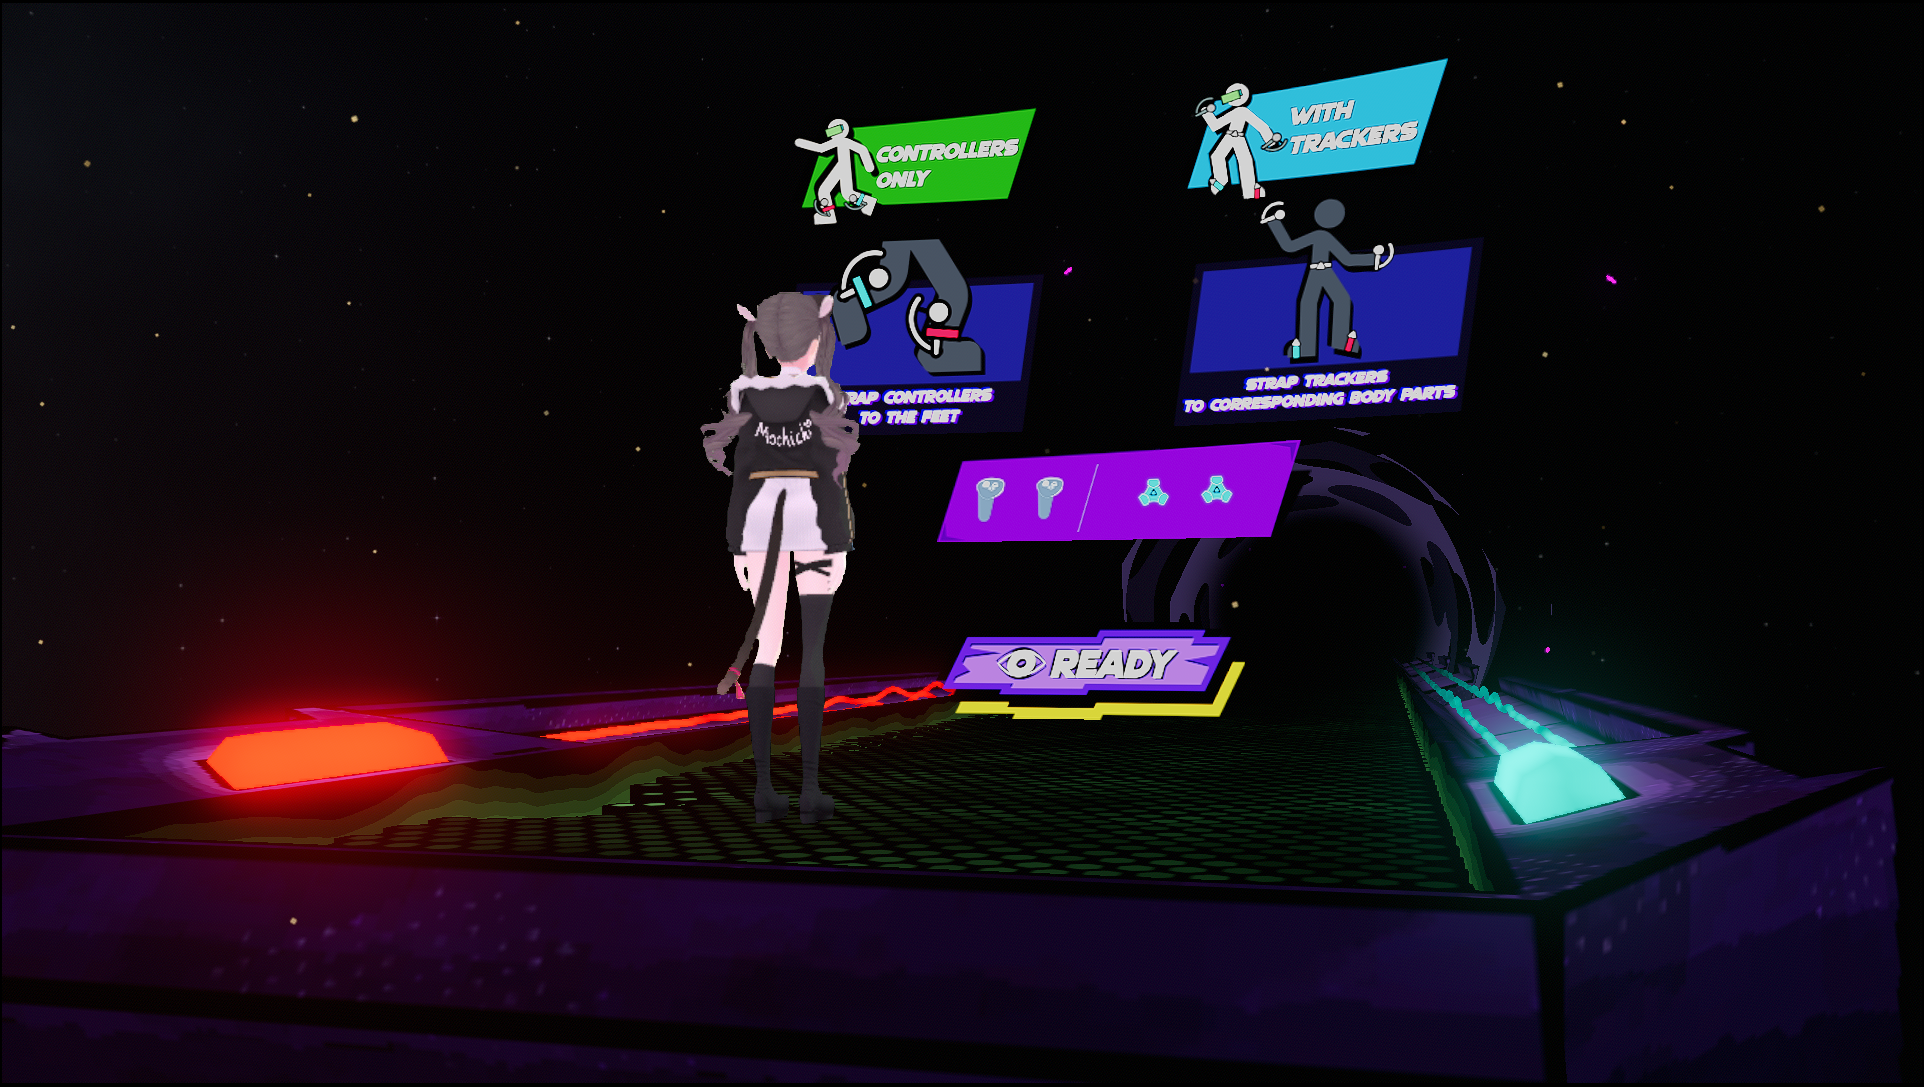
2. Launch Streamlabs to capture your LIV Output
In Streamlabs, go to the scene where you have your overlays and alerts set up for your stream. If you're starting from scratch, create a new scene.
Set one of your sources to be a “Game Capture”, and ensure that the window captured is “LIV Output”.
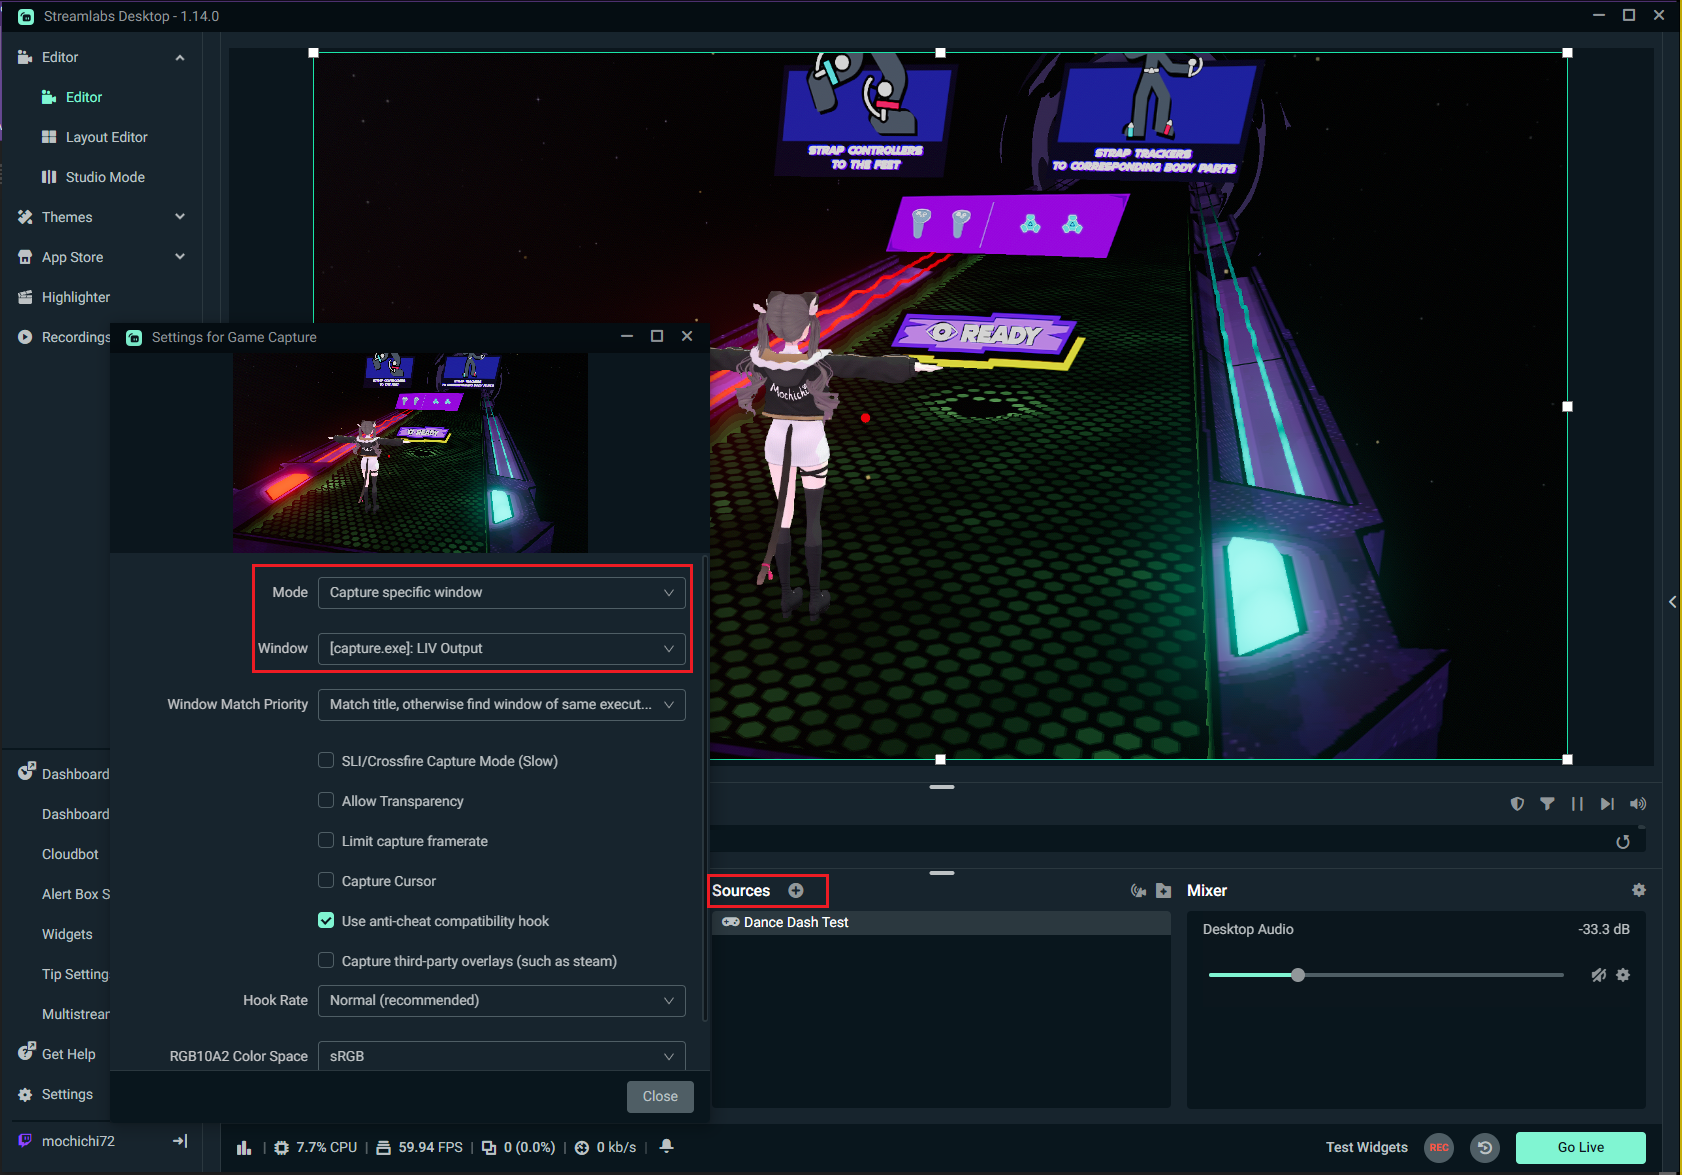
When you're launching your instance to stream/record for your next session: Launching things in the order of “Steam VR → VMC/Calibrate → OBS Studio (Start virtual camera) → LIV/Launching game through LIV” → Streamlabs will most likely provide the most stable results.
Step 3 (?) → For those who want to have both OBS and Streamlabs set up at the same time. (Not necessarily used to stream/record at the same time, but have it both set up)
What you will need to remember is that LIV Output can only be captured by one software at one time. If you went through with the entire setup process from the previous blog, you may have noticed some issues when you try to capture the LIV Output in Streamlabs. This is because OBS Studio had captured the LIV Output first, therefore, Streamlabs couldn't capture it.
Since you would need to launch OBS Studio first to get the virtual webcam working, the chances are that OBS Studio will have priority in capturing the LIV Output.
To change that:
Start this part with both OBS Studio and Streamlabs open
– On OBS Studio, change your game capture output for the source you're using to stream/record to “Dance Dance.exe” (or pretty much any other thing that's not the LIV Output)
– On Streamlabs, doing the above alone will most likely auto-fix itself. If it doesn't, open the settings again and changing the “Mode” to something else, then back again to “Capture specific window” should fix the issue.
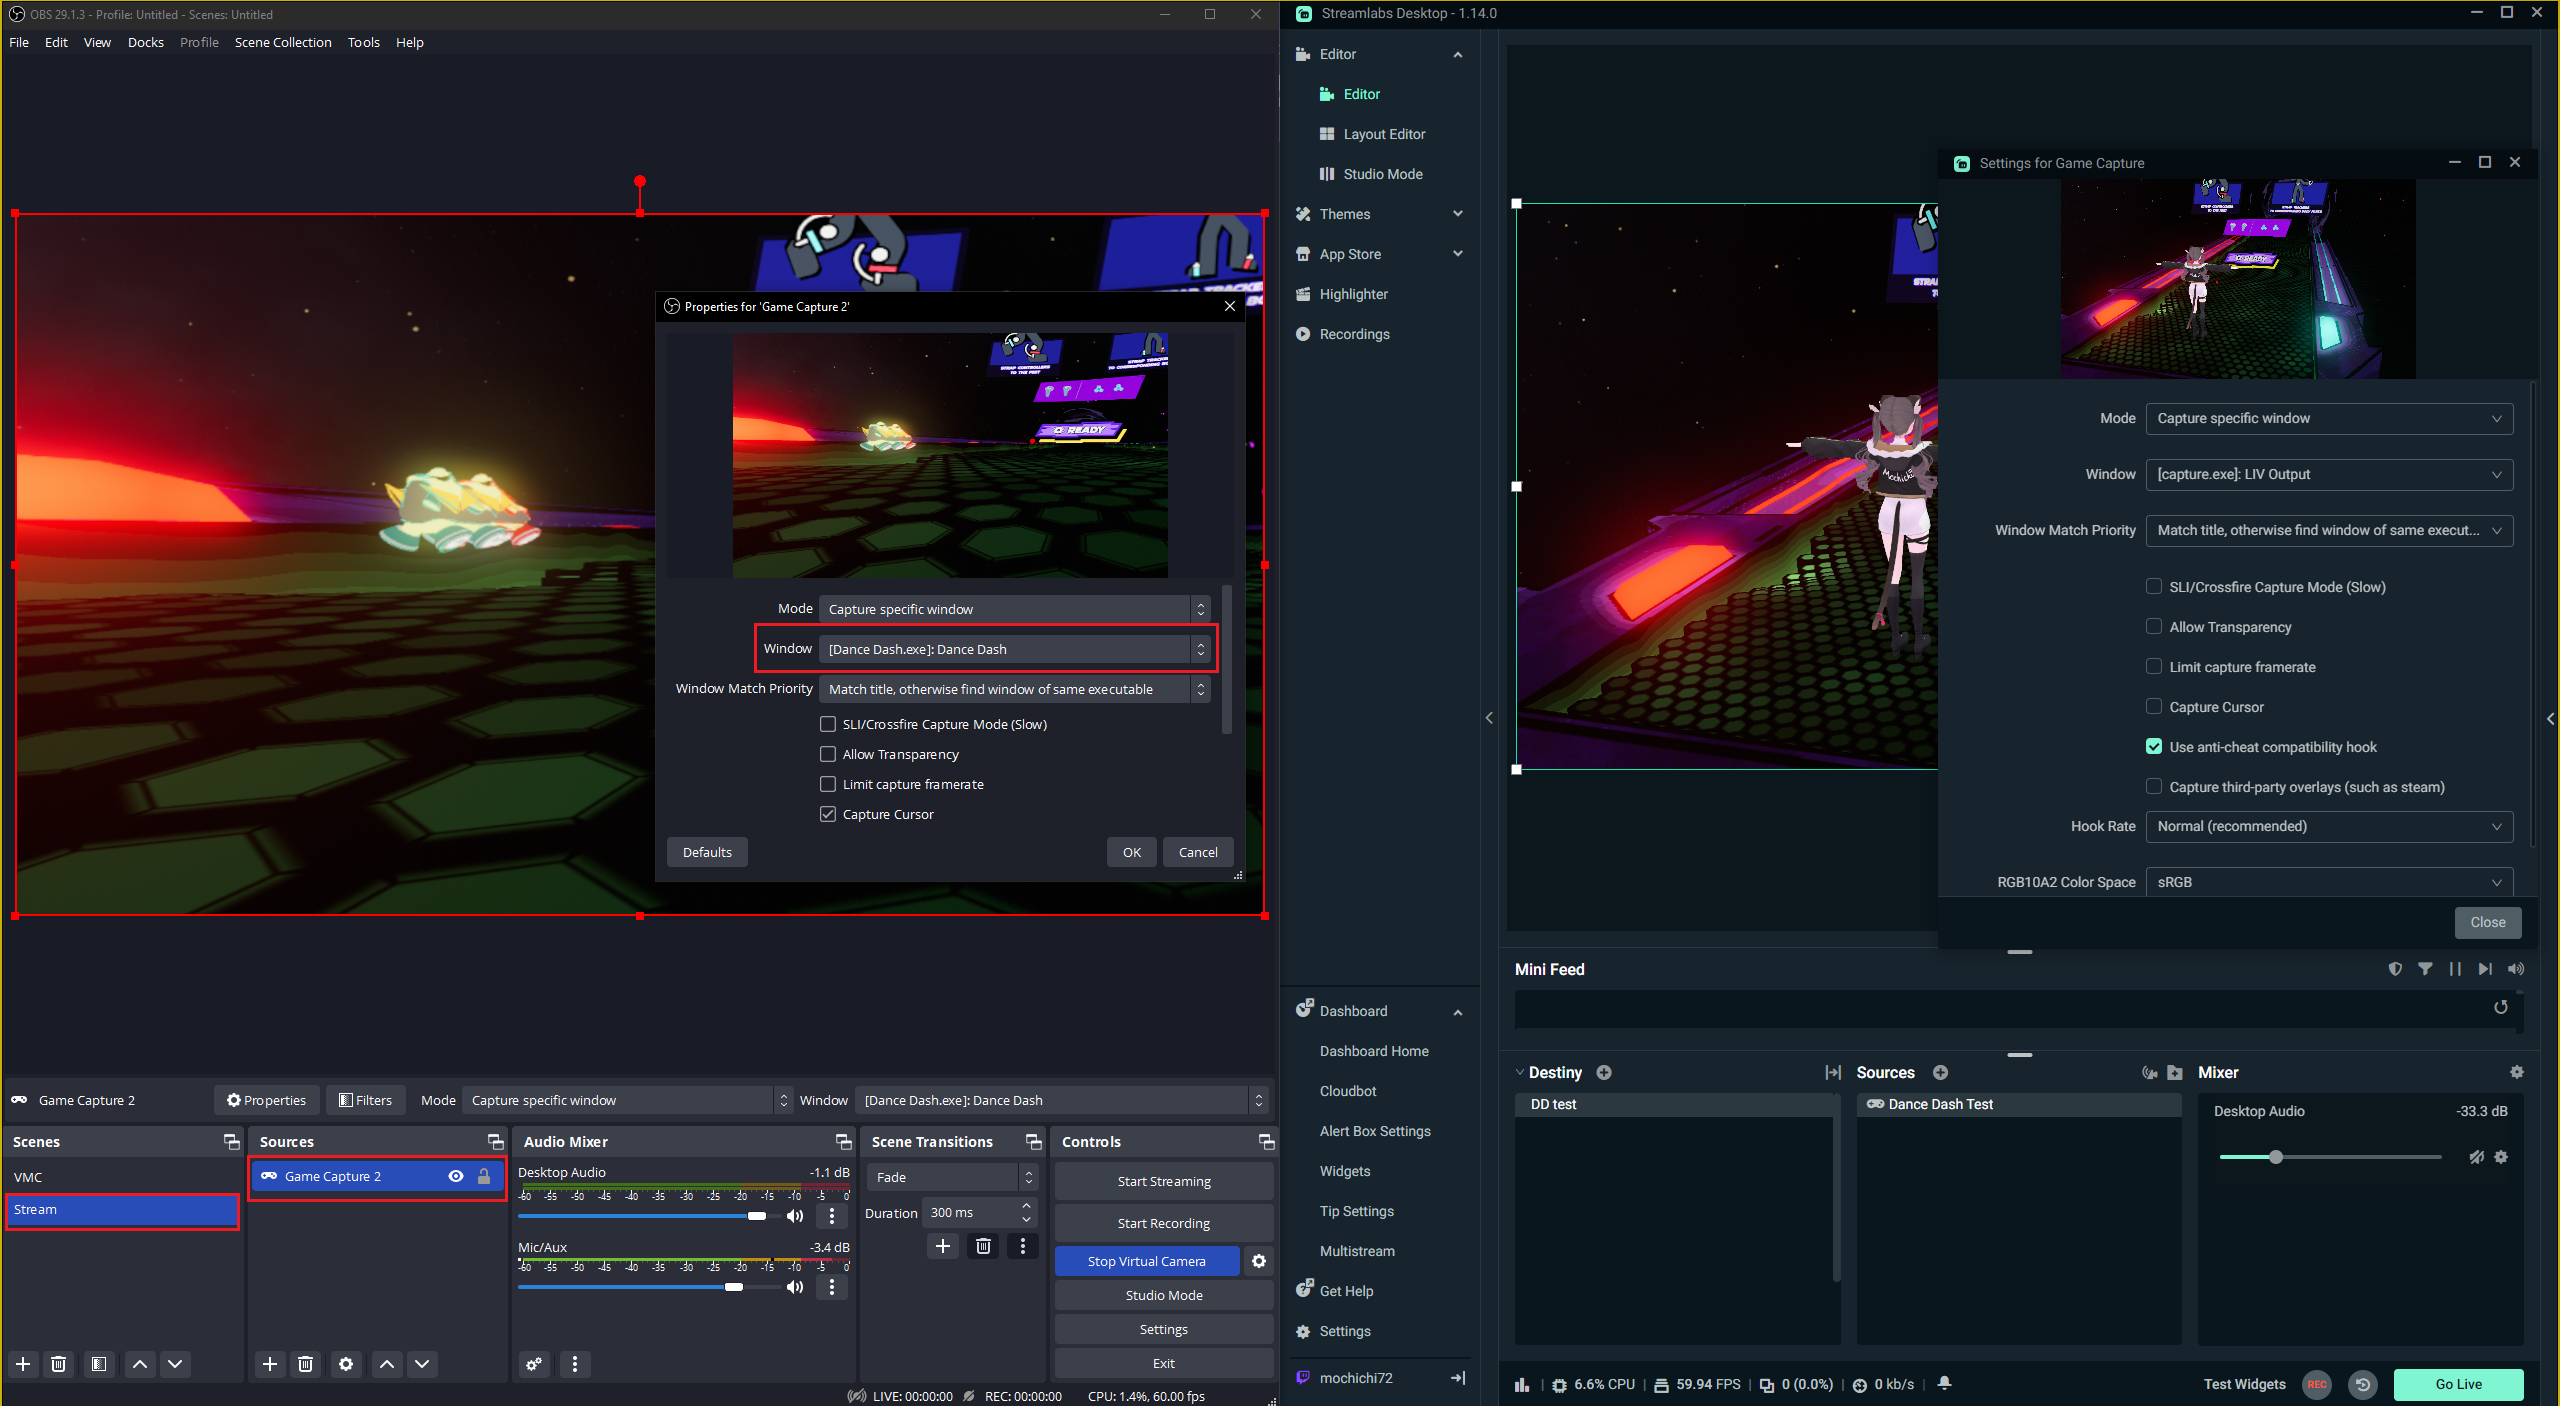
This should cover all that is needed for you to share your amazing Dance Dash content using VMC for your Avatar fullbody tracking.
Happy Dancing! (/・ω・)/
Come join me at https://www.twitch.tv/mochichi72 if you're interested in the content I produce (^^ If you have any feedback, let me know by mentioning me (@.mochichi) on the Official Dance Dash Discord!